Building a RichRap 3dr - Part 4 - Tying spectra line to the carriages
A really really fiddly bit!
In this part I have to tie the spectra line to each of the linear bearing assemblies. I'm making a big thing about this being a fiddly bit as up until now, the only thing that has not been a fiddly bit has been assembling the idler bearings. I was concerned that RichRap described this as a fiddly bit. This probably meant it was going to be really difficult. I wasnt going to attempt this late at night or when I was tired.
So far the instructions had been pretty clear (although reading them from several web locations) and I had loaded the spectraline onto the spools and fitted these to the steppers and the steppers to the bottom frame. You then tape the line to the frame to stop them un-ravelling whilst you start the tricky job of bolting the plastic frame pieces together.
So the main frame is now assembled and I have to thread the line over the idler and back down to the carriage. This then links the motors to the things they are moving.
This all looks fine on the photos below - but its not when you realise how big you are compared to the hard to get to holes in the carriage.
My additional problem was that there was not enough line on the spools (or at least not enough unwound line) to reach the carriage. This left me baffled. The line was supplied in what I had assumed was a 6m length - and I had expected this needed to be cut into 3 x 2m lengths - so all I had done was divided the line into three and cut it. As it was now wound around the reels I didn’t really have any idea if I had cut it equally or had started off with the correct length. Also with my messing about threading it through the spools, burning the end to bed all the threads together - I was concerned that I had further shortened the line, rendering it useless.
So what to do? In the end I decided that there was no choice but to pull the line thus moving the steppers to get myself enough line to be able to tie it. But I was worried that this would leave not enough line left on the spool. I had no other choice so just did it and hoped that this wouldn’t mess up the carriage movement later on.
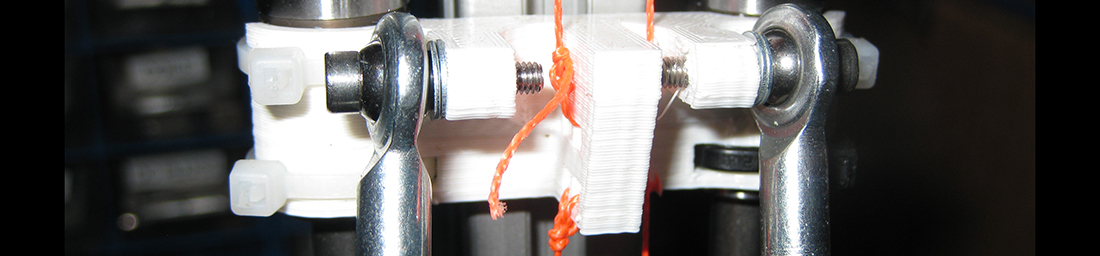
Did I mention this bit was fiddly? EUGH! It was really hard to do this and both thread it though the holes in the carriage and also to tie the knot afterwards. Here's how I worked out the best way of doing it:
I put something the size of a can of beans where the print bed should be and rested the effector assembly on it - this left the carriages at about 3/4 way up the pillars.
Then I pulled out the line from the spools over the idler bearing at the top and then about 5cm lower than the carriage. As I was pulling it I let the loose end of the line wind back onto the other side of the spool and taped that back into place.
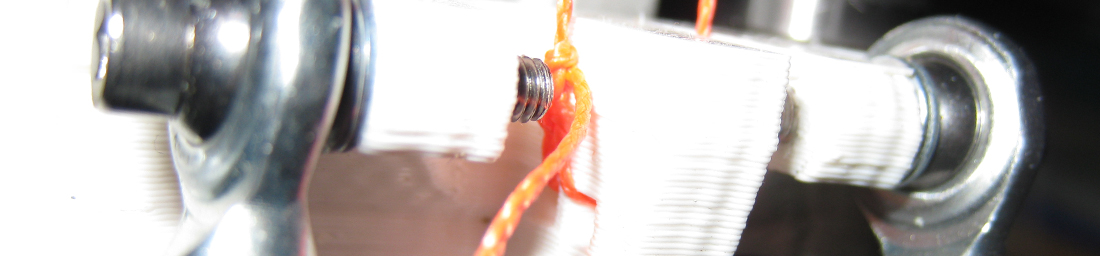
And here was the bit I wish I had done at the start: I removed the line that went over the idler bearing and pulled it down into the area under the top of the frame - that gave me enough room and play in the line with my fat fingers to work on knotting the it to the carriage. I then threaded the line through the holes in the carriage and tied it off several times using tweezers.
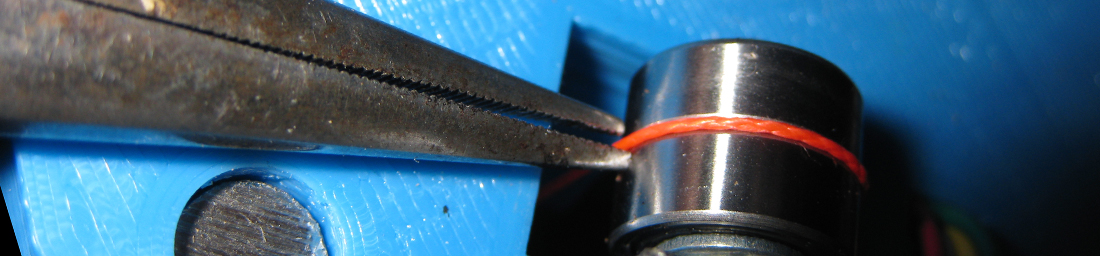
Then I used needle nosed pliers to hook the line though the hole in the top frame and back over the idler bearing.
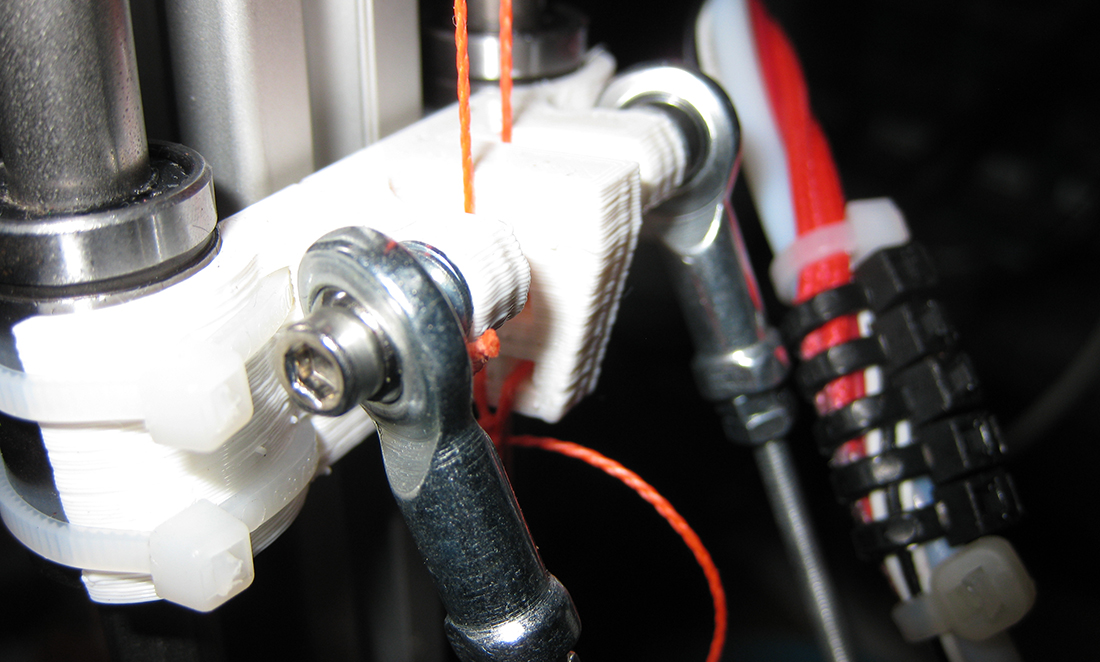
Once I did this with the other two towers - I could remove the tin of beans and the carriages now stay in place attached to the steppers. Then one by one I untape the rest of the line and tie it to each respective carriage.
I must say that I didn’t do this straight away - if I had It would have saved a lot of fiddling - but if I ever have to put new line in in the future - this is the way to do it.
The line is then tightened by spiralling cable ties on the line and pulling them closed, and later on I pushed the idler bearings back up the towers to add some more tension. I was concerned that the cable ties might pull into the hole where the spool is and destroy something - but as long as you put the ties as close as you can to the carriage then all seems ok.
So thats pretty much all of the mechanicals done now - and I’m at a build time (including working out how to time) of about 8 hours.
Here's how the final carriage assembly looks all connected up.
Next - Wiring it all up
Back to Part 3 Assembling the frame
30-Apr-2015 Add comment
blog comments powered by Disqus Permanent Link